How to Make a Cheap, Easy Paper Mache Pinata
(Disclaimer: article may include affiliate links, which do not affect the price you pay.)
Let’s set a few “make a pinata” ground rules before we begin. First of all, if you’re looking for a beautifully-decorated, intricately-designed work of art, you are most definitely in the wrong place. If you’re looking for even a MILDLY-attractive-looking pinata, you’re ALSO in the wrong place. But if you just want your kid to have a custom pinata for his or her birthday party without breaking the bank or requiring you to have a PhD to assemble, then this is the page for you.
My daughter turned three this past September. We had a “county fair”-themed party (see the recap here) with 36 guests, 12 of them being kids under the age of 6. While I had effortlessly dodged the need for a pinata in years past, it seemed like all the parties we had recently attended seemed to have them, and I convinced myself that I wasn’t caving to peer pressure by saying that it would at least keep the kids busy for 5 precious minutes.
I never cared much for the idea of beating animals with a stick (though, as I mentioned earlier, beating PEOPLE with said stick sounds totally fine to me), but every pinata I saw in stores was either precisely that or had absolutely nothing to do with our county fair theme. After way too much Googling, I had this ridiculous idea to make a pinata of a Ferris wheel at home – and it was a lot easier than I expected.
STEP ONE: Collect Supplies
As I said before, the beauty of this pinata is in its simplicity, but the one thing you DO need is TIME. That and a storage area that’s out of direct sunlight, preferably not too humid, and most DEFINITELY out of reach of your children. While it required almost no effort, it DID take me a full week from start to finish, though 99% of that time was totally hands-off.
Planning Checklist:
- One punching balloon – these are better than standard balloons because they’re a) slightly bigger and more durable; and b) come with a string already attached that’s critical for later. Cost: $1 for two
- Liquid glue – you likely already have this lying around your house, in which case start with what you’ve got. You’ll probably end up using the equivalent of about 2-3 cups, so I bought a 16oz bottle at my local Dollar Tree and will be using the leftovers forever. Cost: $1
- Newspapers, magazines, printer paper, etc. – I used a combination of all 3, which is recommended because it gives each layer a different consistency. I just kept an eye on the mail for a week before I started and randomly collected misc. flyers that I wouldn’t otherwise have even looked at. In total, you want the equivalent of maybe 40 pieces of paper. Cost: FREE.
- Different-colored tissue paper – we happened to have an art kit that came with dozens of tissue paper squares that we never used, but I’m sure you’ve accumulated tissue paper over the years. If not, it’s a buck at Dollar Tree. Cost: FREE/$1
- A decently-sized Amazon box and a roll of brown corrugated paper – you’ll use these for your Ferris wheel decorations. Cost: $1.
- Kitchen twine – you’ll use this to hang the pinata, but any old string will do. Cost: FREE.
- 3 old cereal boxes – you’ll use these to support your Ferris wheel cars. Cost: FREE.
- A plastic bowl – you’ll use this to mix the glue. Cost: FREE.
- The handle of a mop, duster, snow shovel, golf ball retriever, toilet bowl snake (no, gross), etc. – this is what it will be attached to. Cost: FREE.
STEP TWO: Plan Ahead
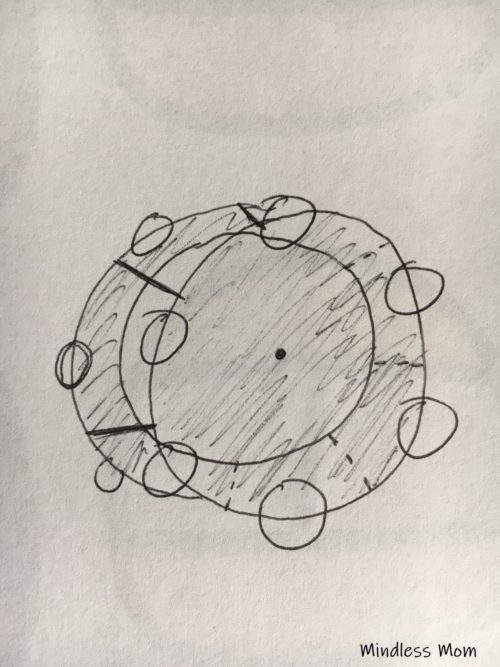
The most obvious step to make a pinata is to figure out what design you want. We chose a Ferris wheel only because it complemented our party theme. I found photos of Ferris wheel cars online and printed them large enough so they wouldn’t be dwarfed by the balloon itself. Then my husband drew a rudimentary 3D sketch of what we were envisioning, which came in handy later on so we had something to refer to.
Once you’ve assembled all your supplies, cut all paper pieces long-ways into strips that are approx 1″ to 1.5″ each. This is not rocket science, so eyeball what looks normal and don’t worry about cutting straight. Just keep the strips of each material (e.g., newspapers, magazines, printer paper, etc.) with each other since you’ll be working with them in separate groups.


Each stage will take you approximately 10-15 minutes, and it will need to be done over several days, so having one set place to set up shop will be helpful to you. We have no room in our house, so I just removed and replaced the pieces every day without it being a big deal. But once you’ve selected your workspace, cover the table – and yourself – with plastic or something that will protect it from spills. This can get pretty messy, so I planned most of it around B’s nap schedule to avoid the risk of spilling glue on the floor. I actually used her art smock because I knew I could stick it in the washing machine afterwards with no effort on my part.
Right before you’re ready to start, mix about 1/2 cup of the glue with about 1/8 cup of tap water. The consistency will become less thick and slightly more malleable. Blow up the balloon, put on your apron, and mentally prepare yourself not to scratch your nose or go to the bathroom for the next 15 min.
STEP THREE: Build the Foundation
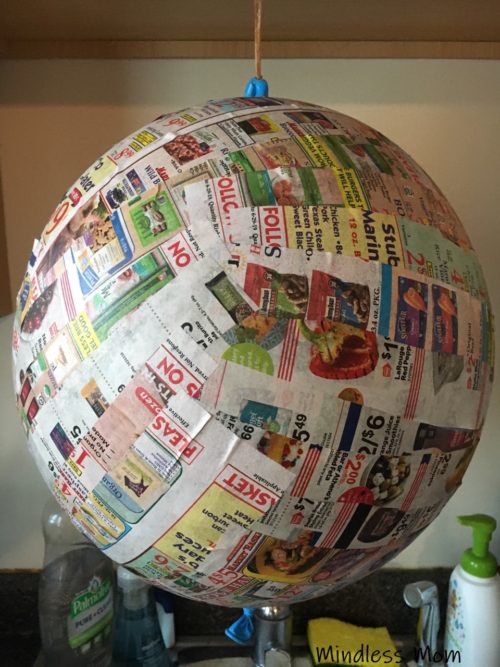
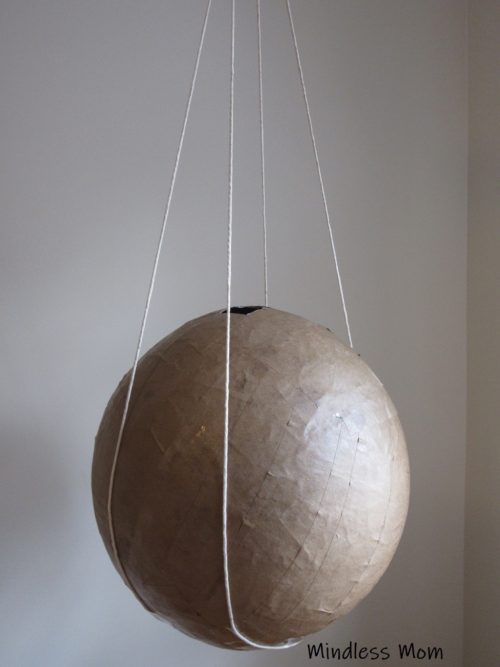
Dunk one strip of paper at a time into your glue mixture (I like newspaper to start), making sure to coat both sides with just enough stuff to become slippery in your hand (no need to overdue it because it will take longer to dry – just make sure it attaches). Start from the top center – where you’d hold the punching ball from – and lie the paper vertically, though the direction really doesn’t matter. Cover the entire balloon in this way, trying to avoid overlap but also being sure to cover all visible parts. When you’re finished, hang the balloon up to dry until it’s no longer wet to the touch – for me, some layers dried in 6 hours, while others took 12.
For the second layer, use a different type of paper (printer paper or magazines maybe?) so you’re able to tell them apart from what you already did, and lie THESE papers in the OPPOSITE direction of the previous layer (so if you started with vertical strips, make the second set horizontal).
Keep repeating this on-off sequence over time/days until you’ve got about 5 sets on there. Make sure that the last set is white printer paper (if you’re planning to paint it) or brown corrugated paper (which is what I used since I didn’t feel like painting anything). Don’t be alarmed if it looks like your balloon popped – by this point, your paper should be strong enough where it won’t matter.
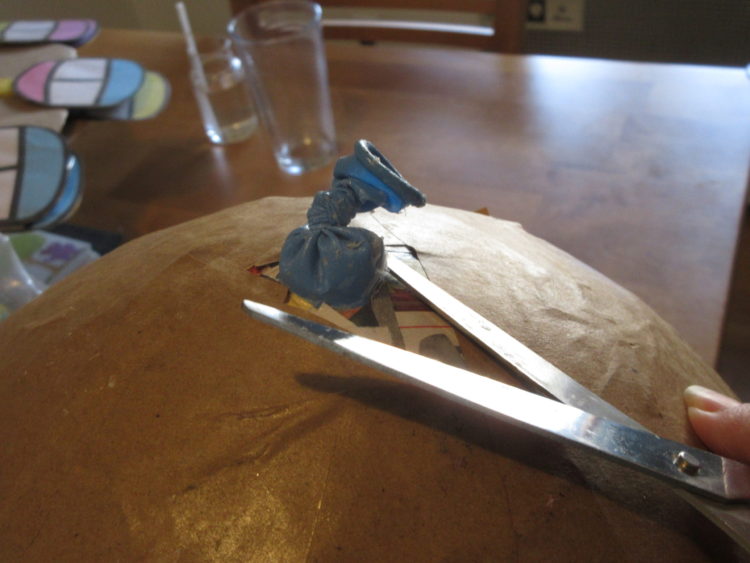
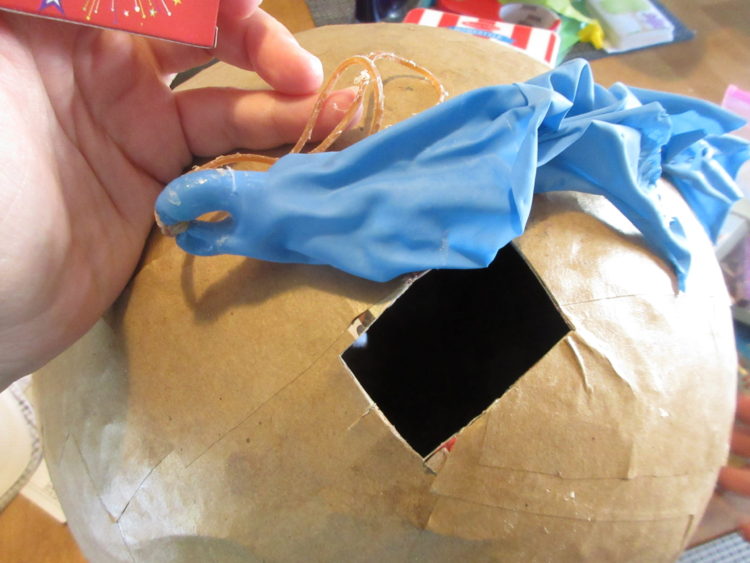
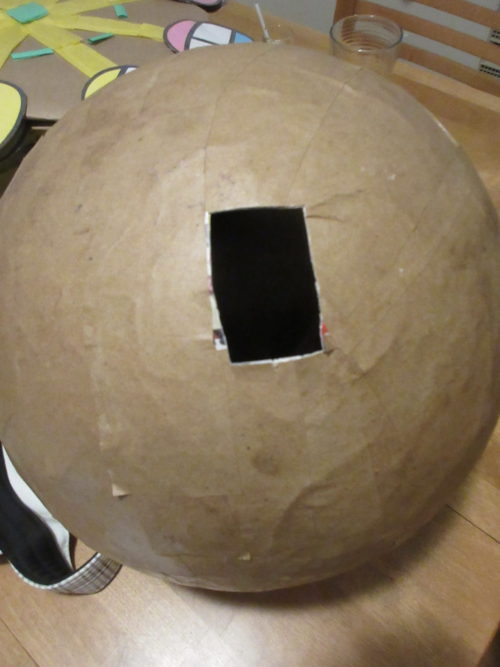
When you’re confident that the ball looks like it should, pop the balloon by cutting it where you tied it shut, and pull out all the pieces. Take two evenly-sized pieces of kitchen twine or string and place them around the ball so they can be held by the OPPOSITE side of your opening, and tape them all around to secure them (see photos below) – these will hold up your pinata later on, so cut string sizes that allow it to hang however high or low you’d like.

STEP FOUR: Decorate and Attach
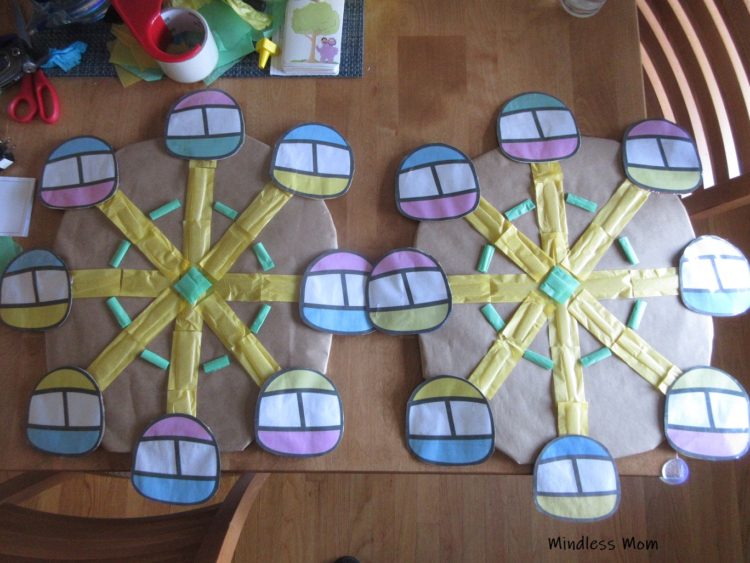
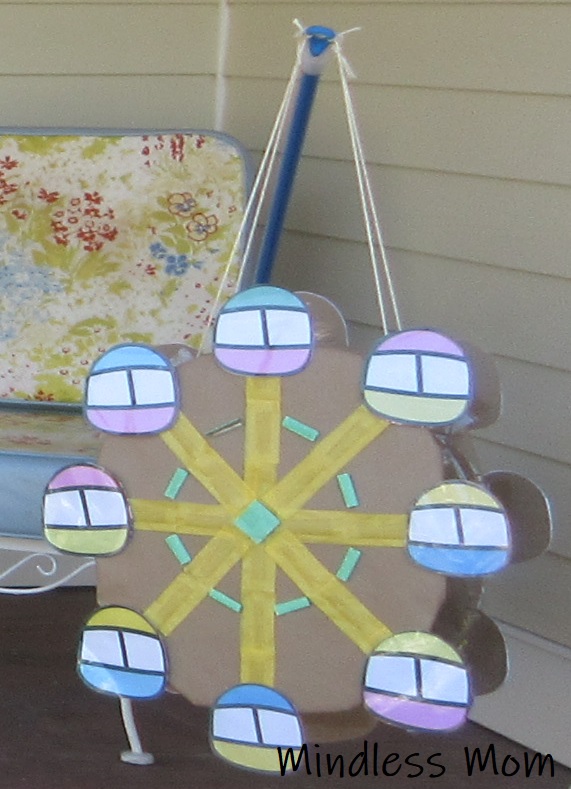
Take your Amazon box and cut out two big circles, which you’ll use as the Ferris wheel backbone itself. Cover them with the corrugated brown paper. Take whatever printouts you’ve selected, cut them out, and tape them onto your old cereal boxes to make them sturdier. Add the tissue paper for decoration as shown in the pictures below, and make your design. In my case, I used the tissue paper for the spokes, simply because I have zero artistic talent and couldn’t think of anything else to use. Make sure that you make both sides mirror images of each other (generally speaking) or else it may look a little weird.
When you’ve finished both of your matching Ferris wheels, tape them to opposite ends of your balloon (I used packaging tape). Take the hanging ends of your string and affix them to your long pole (we used a dust mop with the head removed). You can try attaching it to something like a tree, but we didn’t have any near us so I made my husband hold it. My best advice is to ensure that whomever DOES hang onto the pinata covers any vitally-important body parts, as he or she will likely be getting hit by some rogue swing at some point or another. Or just task the person you like the least with that job as a means of ensuring he or she never returns.
Either way, while it wasn’t pretty, the pinata served its purpose and didn’t cost me a fortune to make so that was a major plus in my book. I’d definitely do it again if I had the time and the energy, and probably SHOULD have done a tractor one for my daughter’s farm-themed party too because that would have been cool. And ultimately, after all was said and done, I think it did add something fun to our country fair event, which was my ultimate goal anyway.