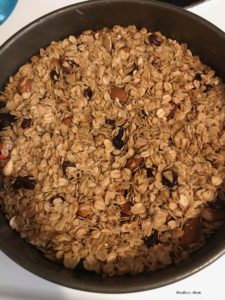
I’ve been allergic to nuts my entire life – so it’s only natural that one of my daughter’s favorite things to eat is, of course, nuts. And what better way to get as many of them together at once than to put them in… granola!
Most moms would wisely heed the glaring warning signs here and just stay away from items that can kill them, but I’m a glutton for punishment. Actually, I’m just really desperate for different things to do, and a certain element of risk is sometimes required to keep both B and me from going insane.
I proposed the idea of making granola on a day when it was about 55 degrees outside and raining. B couldn’t be more disinterested. But two days later, when it was about 98 degrees with a humidity to match, she HAD to make granola. The fact that I had planned our dinners out for a week just to ensure that I WOULDN’T have to turn the oven on that day was ancillary because, well, Mommy, you just should have known better.
B ended up making this entire recipe all by herself, which was extremely fortunate for me seeing as I didn’t have to check myself into a nearby hospital in the middle of COVID, so that was much appreciated. She also felt a big sense of accomplishment afterwards, even though I’m not entirely sure she thought it tasted all that great. But in the end, one afternoon in the books and nobody got hurt so VICTORY!

DIY GRANOLA INGREDIENTS:
- 3 cups old-fashioned rolled oats
- 6 TB canola oil (we used about 4)
- 6 TB honey or maple syrup (we used about 3 and should have used more)
- Any combination of nuts, dried fruits and spices you like (we had almonds, trail mix, dried cranberries and raisins – cinnamon might have been a good idea)
DIY GRANOLA INSTRUCTIONS:
- Preheat oven to 300 degrees.
- Place oats in a 10″ cake pan (we used 9″ – it was fine). Drizzle with oil and honey. Using your fingers, mix well.
- Add in your favorite nuts, fruits and spices. Stir together.
- Shake pan so everything is in an even layer.
- Bake, stirring occasionally, about 40 minutes or until golden (we forgot about it and only stirred once – it was fine).
- Cool completely in the pan before storing/eating.

